Friday 23 August 2013

Pizza Crust Recipe (Gluten-Free)

Description

Another recipe created in an attempt to make gluten-free bread products that aren't pure refined starch.

Ingredients

125 ml rice, whole white
125 ml flax, whole seed
125 ml rice, whole brown
125 ml sorghum Flour
1/2 tsp xanthan Gum
1 tsp salt
1 tablespoon yeast
2 tablespoons brown sugar
190 ml water (warm)
2 egg
1/4 cup olive oil

Directions

First I ground my flax and rice in the Vitamix to start the flour mixture, and then mixed in the xanthan, sorghum, and salt.

In another bowl mix the sugar and warm water (41C to 46C) until the sugar is dissolved and then add the yeast.

In another small bowl beat the eggs together; once the yeast has begun rising stir in the eggs and olive oil and add to the dry ingredients.

Next, oil a loaf pan and place the dough in it. Like most gluten-free dough it will be too sticky to knead the way you would a wheat dough, but it should be nearly the same consistency at this point. If the dough is not too wet I sometimes use a sheet of parchment paper and a rolling pin to get my dough to a nice even thickness across the pan. You can also wet your hands to spread the dough, when your hands start to stick just wash and re-wet them.

Now, preheat your oven to 200C (~400F) and set the dough aside to rise for about 25 minutes.

Put it in the oven to bake for about 15 minutes. The crust should be cooked and starting to brown on the bottom. Time to dress it the way you like it.

Wednesday 22 May 2013

Dual Boot - Debian 6 and Windows 7


My main purpose in installing Linux (this time) is so that I can experiment with it in conjunction with my Raspberry Pi. And since my new favourite toy is running the Raspbian OS I chose to install Debian, the distribution of Linux that Raspbian is based on. Having the full up Debian distro on my desktop will give me access to the software and support community surrounding Debian as well as the quickly growing Raspbian community.

For full and detailed install instructions for Debian you can refer to the installation manual.

I deviated from the typical install method for Debian in three important ways. First, I intend to dual boot Debian on a machine that already has Windows installed. Second, I used Logical Volume Manager (LVM) to create my own partitions for my installation. Third, I kept my Windows boot-loader intact so that if my Debian install fails it will automatically boot into the Windows OS and vice versa.

First I'll say a little bit about my desktop system and how it was setup before Debian. I am using Windows 7 x64 and I have two hard drives installed. The first drive (the newer of the two) is a SATA II with 500 GB capacity, the second drive (the older) is a PATA IDE  drive with 200GB capacity. The PATA drive was set-up as the first boot device and contains all of my operating system files including the Windows boot manager on the master boot record (MBR). The SATA drive was already divided into two partitions, the first partition which is approximately 50 GB is now housing Debian; the second partition already contains data and is formatted with NTFS.

Before making any changes, I made sure that my current project data was backed up on my NAS and carefully checked all my drive information. It’s a good idea to write down the actual disk sizes and other identifying information for each of your current partitions and drives; this can be used as an extra check before you make changes. If your process ever involves changing boot order or using different disk utilities drive labels can change and it’s always good to have more than one way to check which volume you're really looking at; taking lots of notes throughout the process is always a good idea too.

To start with my install, I used EASEUS Partition Manager (free for personal use) and deleted the first partition on my SATA drive (~50GB). After this I restarted my PC with the Debian install CD in my DVDROM drive and chose the Graphical Install option. The first few steps when using the installation wizard involves a number  of locale and network settings. Eventually we come to the Partition Disks section of the wizard. I needed to use the Manual option as I wanted to keep my second disk partition intact; I also chose the ‘Manual’ option because I wanted to learn more about server configuration and logical volume management (LVM). One of the particularly useful features of the LVM is that you can combine multiple disks (physical volumes) to make one large space and logical volume group (LVG) and then create as many smaller partitions within it (logical volumes) as you like, this is very useful for servers and RAID volumes.


If you want to learn more about LVM there is a great guide here. One thing to note, is that you need to double click to select options as you proceed through the LVM and partitioning section of the wizard.

Okay, double clicking all the way, I chose Manual and then Configure the Logical Volume Manager and create a logical volume group. I named my group 'lvg1' and selected the physical volume where the LVG would reside, for me this was the free space on the first drive as I had deleted the original partition there. After making all of these selections I can write my changes to disk and this leaves my current drive and partition configuration as shown below.

This view was generated by running the fdisk shell command (fdisk -l). As you can see 'sdb1' is my first boot device with Windows installed (~200GB) and 'sda1' is an extended partition now housing 'sda2' which is my Linux LVM partition.

After creating the LVG I wrote these changes to the disk and displayed the configuration to verify my settings.

Next, by double-clicking on the LVG you get options for creating your logical volumes; I created three volumes and wrote the changes to disk. I then configured these volumes by double-clicking on them and choosing file systems and mount points. These are the configuration settings I chose:

LV Name Size File System Mount Point
vol1 150MB EXT2 /boot
vol2 3GB swap
vol3 >Free Space EXT4 /root

Once you've chosen a mount point for root ‘/’ and written these changes to disk it should begin the rest of the install process automatically. If you want to look at the logical volume partition information after you are done you can use LVM commands from the command line. I used root terminal from within the desktop GUI to examine my partition information. Shown below are the commands I used in the terminal window and the partition information displayed.

For information about the volume group use vgdisplay


For volume information use lvdisplay

When I got to the boot-loader installation stage (Grub2 is installed), I let it install on the master boot record (MBR) of the first drive (labeled sda) which is the default option. Because of my drive configuration this is not the first boot device or the drive which contains Windows so the windows boot-loader does NOT get overwritten. During the install process Grub automatically recognizes my previous windows install and configures itself appropriately, allowing me to choose between the two operating systems when the system boots.

One final step, in order for Grub to work it needs to be on the first boot device. So I have to change the boot order by entering your motherboard's BIOS and changing the device boot order. For my motherboard this involves restarting the computer and then tapping delete key when the Asus logo screen comes up. This is a common method for entering the BIOS for many motherboards (the F10 or F8 keys are also common), you need to check your motherboard model documentation for this information. I need to set my SATA hard drive (sda) to boot first; so I changed my boot order to 1) Debian disk (sda), 2) Windows disk (sdb) and 3) DVDROM drive. In this configuration if an OS is not found on the boot device, it is skipped and the next one is tried. With my windows boot-loader intact it becomes my fail-safe OS.

With that completed the Grub OS menu now presents itself on restart and I can choose from Debian, Debian (safe mode) and Windows 7.

Friday 8 March 2013

Flax Bread Recipe (Gluten-Free)

Rant

There are lots of recipes for gluten-free (GF) bread out there, but they are typically made with white rice and tapioca starch along with a tiny bit of some grain. So little grain that it would seem that it is just for colour, or as a gesture towards good nutrition. The store bought breads are the worst for this; take a look at a 'whole grain' GF bread in the supermarket some time and see how far down the list something containing fiber occurs. So, I've been experimenting with different GF yeast leavened bread recipes for a while to make something that compares with the nutrition and flavour of my dad's whole wheat bread recipe.

Description

I like this bread a lot because it ends up with a nice nutty flavour from the flax. Also, It holds together pretty well, stays moist and doesn't crumble when you look at it. This recipe is meant to be a fairly heavy, nutritious and solid bread but it does rise a fair bit with the yeast as leavening agent.

Ingredients

125 ml rice, whole white
125 ml flax, whole seed
125 ml rice, whole brown
125 ml sorghum Flour
1/2 tsp xanthan Gum
1 tsp salt
1 tablespoon yeast
2 tablespoons brown sugar
190 ml water (warm)
2 egg
1/4 cup olive oil

Directions

First I ground my flax and rice in the Vitamix to start the flour mixture, and then mixed in the xanthan, sorghum, and salt.

In another bowl mix the sugar and warm water (41C to 46C) until the sugar is dissolved and then add the yeast.

In another small bowl beat the eggs together; once the yeast has begun rising stir in the eggs and olive oil and add to the dry ingredients.

Next, oil a loaf pan and place the dough in it. Like most gluten-free doughs it will be too sticky to need the way you would a wheat dough, but it should be nearly the same consistency at this point.

Now, heat your oven to 200C (~400F) and set the dough aside to rise for about 25 minutes.

Put it in the oven to bake for about 40 minutes.

Tuesday 5 March 2013

RPi Remote Access Using SSH


Secure Shell (SSH) is a remote communication tool that uses cryptographic methods to create a secure connection between two computers. Your local computer needs to have a client which supports the SSH protocol and the remote host, the computer you want to control needs to have a server that also supports the protocol. This security protocol uses a public and private key pair in order to encrypt information before sending it between the client and the server.

From now on I will refer to the local host (my desktop) as the client, and the remote host (the RPi) as the server. The pair of encryption keys is composed of a public key and a private key; the client keeps copies of both and exposes only the public key, which is sent to the server. Some further authentication is used when the client and server devices first communicate through the use of a hash code. You can also protect the keys on your client through the use of a password that is set when the keys are first created; but this would be overkill in my case.

The client I am using for all of my secure connection needs is called Bitvise, it works very well and is free to use; you can obtain a copy 
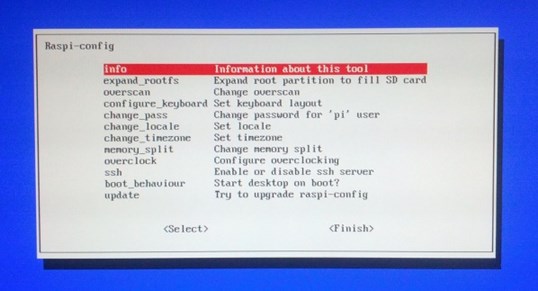
here. The Raspberry Pi (RPi) 'Wheezy' OS comes with an SSH server installed.

We need to generate a key-pair for our use, and this can be done directly within Bitvise using the key-pair manager. On the Login tab click on the User keypair manager link and hit the Generate new button. I created a key-pair using the ssh-rsa format with a 2048 bit length and no pass-phrase.

We are also going to need the IP address of the server, this can be accomplished by using the command ifconfig at the command prompt. This same command provides a number of functions for the ethernet adapter settings, if you ever want additional instructions for a particular command you can often use the --help parameter (for example ifconfig --help).


Now we can connect to the server by setting up the Bitvise login tab with these parameters:

host: <serversipaddress>
port: 22
Username: pi
Initial method: password
Password: <yourpassword>

The server will then provide a key in order to verify that you are communicating with the correct server, since I highly doubt someone has hacked through my firewall this morning I'll just Accept for this session without checking the signature (hash). When the connection is established it opens both a terminal window and a secure file transfer protocol (SFTP) window .

Now we can remove the default ssh keys that came with the OS and then regenerate them (this improves our security). In order to remove all the keys at once we run the rm command using a partial file name (using the elements that the file names have in common) and a 'wild card' as seen in the image below. To regenerate the servers keys we then run dpkg-reconfigure on the openssh-server.

Note: all of these commands must be run as a super user (using the sudo command), it's equivalent in windows is to Run as administrator.


Next we need to add our public key to a file containing our user's authorized keys (in this case the user is pi and the home directory is  /home/pi). There are a number of steps involved in doing this:
  1. hit the Export button within the key-pair manager and save the file locally in OpenSSH format.
  2. copy the public key over to the users home folder using SFTP
  3. make a directory to house the ssh keys for user pi as shown below (mkdir).
  4. modify the file permissions (chmod) so that the owner has read/write and execute permissions (700)
  5. add the text from the key file to the end of the authorized_keys file (cat).
  6. modify permissions of the authorized_keys file so that only the owner can read and write to the file (600).
  7. and finally move (mv) the new key into the .ssh folder. 
Note: the ~ symbol denotes the current users home directory so ~/ can be taken as /home/pi/


This procedure can be repeated as the root user. For both safety and security reasons, it is best to always install and modify things using a non-root account. However, sometimes a program or service will need to be installed and configured while logged in as root.

Now that everything is configured correctly we can log out of our session on Bitvise and log back in by selecting Initial method publickey and choosing the slot where your key resides. You can also re-save your profile in Bitvise and from now on all you need to do is load that profile and hit the login button.

I find security a fascinating topic and I'm interested in learning more about this type of security in the future, but for now I'm satisfied with learning how to use it.
If you would like to learn more about it, in the guise of pure entertainment, there is a great teen novel by Cory Doctorow called Little Brother. In the novel he offers a simplified explanation of some authentication and encryption techniques, and weaves it into the story.

Here is a great Wikipedia article on the topic http://en.wikipedia.org/wiki/Public-key_cryptography

There are a number of simple configuration changes we can make to improve security, but we'll save those for a follow up post.

Wednesday 27 February 2013

Setting up my new Raspberry Pi

Equipment:
  • Raspberry Pi Model B with 512MB RAM
  • 4 GB Flash Card (SDHC)
  • Power Supply (USB A - 1A 5.25 VDC)
  • USBA - Micros USB B Cable
  • Red Case (from element14)
  • Ethernet Cable (CAT5)
  • HDMI Cable
  • HDMI to DVI-D Adapter
  • Acer Monitor (DVI-D Input)
  • USB Keyboard
Software:
My PC:
  • Windows 7 x64
The first step in setting up the Raspberry Pi (RPi) is to choose and download an operating system (OS). I chose the simplest option which is the Raspbian Wheezy OS; Raspbian is based on Debian Linux and the Wheezy package contains a bunch of software that is ideal for learning to program on the Raspberry Pi.

I downloaded the disk image using torrent, you can get the torrent file through the link above. It's always a good idea to check any data or executables (especially programs/executables) to ensure it has not been tampered with; for this purpose I used a free piece of software called Free MD5 SHA1 Verifier. The verifier software creates an MD5 or SHA checksum from the data in the file I downloaded, and then compares it against the publishers checksum (also called a hash sum). In this case raspberrypi.org displays an SHA-1 checksum on their webpage for you to compare with.

Now with the operating system (OS) image verified, we have to 'burn' the image to a disk. Since I have a Windows PC I used Win32DiskImager to burn the image to my 4GB SD card. An image is basically a bit by bit exact copy of a chunk of data, in this case it is an exact copy of a working OS made for the Raspberry Pi.
  1. The image comes in a zip file, so you need to extract it to a folder. 
  2. Run the disk imager and hit the folder icon to browse to the image file.
  3. Select it and hit the save button.
  4. Select the device you are writing the image to in the drop-down menu labelled Device (my SD card appeared as disk G). 
  5. Verify this is the correct disk before you press Write because this will overwrite any data currently on the disk.

You should end up being able to see a small portion of the disk in Windows because it is formatted as FAT32, this is the boot portion of the operating system and should be about 56MB.

Now we can connect the RPi to the peripherals. I am using one of my PC monitors for the initial set-up using an HDMI cable with a DVI-D adapter (this came with my graphics card). I will be using either VNC Server (remote desktop) or an SSH command line terminal with my RPi after set-up and therefore will no longer need a monitor.

Note: There is no hardware power switch on the board, connecting the power cable turns the computer on, so I leave that step for last.


Connect the Ethernet, HDMI and keyboard as shown above.
Insert the SDCard carefully into it's slot on the underside of the board.


And then connect the micro-USB cable to it's connector on the board to apply power.

The computer will immediately start loading system files into RAM when the power comes on; then there are a few initial configuration settings to choose in the Raspi-config tool. For a complete description of this program and the options offered, the documentation here is quite good. I will just provide a list of my choices and describe a bit of my reasoning. 


expand_rootfs - the card is now divided into a boot partition and the root partition which contains all of our OS files, this option will expand the root partition to use any empty space leftover on the card.

change_pass - the default password and username are on the website Username: pi Password: raspberry so you should probably change it.

change_locale - this determines the default settings for time/date, language and currency formats. I live in a commonwealth country so I chose en_GB.UTF-8.

memory_split - this determines how much of your 512 MB ram is used for graphics, in my case I plan on mainly using this as a headless Linux box (no desktop graphical user interface) so I chose 16 MB.

overclock - is an interesting thing to experiment with, but that's for a whole other post and doesn't need to be configured yet (keep default settings).

ssh - This enables a server to start up at boot time that handles a secure connection for remote control of the computer. I have enabled this, but again I'm going to save setting it up for another post.

boot_behaviour - I am planning on using a remote connection that does not require the desktop environment to be running, so I will disable boot to desktop. But if you wish to use your Raspberry Pi right away and use a more familiar sort of graphical interface you should probably choose to boot to desktop.

Now we hit finish and choose to reboot the computer; it will finish setting itself up based on your choices as it restarts.

This is where I am going to end this post, but I am planning several follow ups in order to document my fun with over-clocking, setting up a LAMP stack, and adding a torrent service.


Sunday 3 February 2013

Crepes Recipe (Gluten-Free)

Description

This recipe turned out very well, the crepes can be spread to a nice even thickness, they remain pliable and most importantly they are rollable. I stuffed mine with a mixed fruit sauce and cottage cheese, and then topped them with maple syrup.
 

Ingredients

125 ml rice, white sticky rice
125 ml flax, whole seed
125 ml tapioca starch
125 ml sorghum Flour
1/2 tsp xanthan Gum
1/2 tsp salt
1/2 tsp baking powder
1 1/2 tablespoons sugar
500 ml milk
4 eggs
1 tsp Almond Extract
1/4 cup peanut oil
   

Directions

I started this recipe by grinding my flax and white rice in the Vitamix to start the flour mixture, and then I added the xanthan, sorghum, tapioca, salt, sugar and baking powder and blended that. After dumping it into a mixing bowl I blended the wet ingredients in the blender (milk, eggs, oil, and almond) on low speed. Now mix the dry and wet ingredients, while mixing you will have to add water to get the mixture to the right consistency.